How often does one post a blog? In my last one, I'd said that I was going to be more diligent about blogging. It's been two months since the last one. Is that often enough? Anyway, I have been busy creating minis. Not much else to do when the weather outside has been as frightful as it has been.
In that spirit, one of the things that I'd been working on was to develop a kit for my mini club for snowshoes. It's an ironic project because at the time it was suggested to me, winter was far away. By the time, my teaching session was imminent, everyone in general was heartily tired of the seemingly never ending series of storms we've been experiencing. It's one of my favourite things to do, figuring out how to make a particular project. I must say though, this is one of the more challenging projects I've ever attempted. In the end, I'm pretty please with the result. I'm not so sure if the members of my club feel the same way!
In that spirit, one of the things that I'd been working on was to develop a kit for my mini club for snowshoes. It's an ironic project because at the time it was suggested to me, winter was far away. By the time, my teaching session was imminent, everyone in general was heartily tired of the seemingly never ending series of storms we've been experiencing. It's one of my favourite things to do, figuring out how to make a particular project. I must say though, this is one of the more challenging projects I've ever attempted. In the end, I'm pretty please with the result. I'm not so sure if the members of my club feel the same way!
| To make this project, I determined early that using actual wood to make the frames was not going to be possible. I found cloth covered floral wire which I could paint to simulate wood. It was 16 gauge or so, just stiff enough to hold its shape but easy enough to bend by hand, keeping in mind that my club members had four hours to complete this project. I had also added a mukluk kit to accompany this kit but in retrospect, I should have saved that for another time. More on that later. I then glued two small pieces of wood crosswise near the toe and near the tail. Using artificial sinew from Tandy Leather was perfect as it was easy to work with and simulates the rawhide that is used in real snowshoes. I split the sinew in thirds, which is quite easy to do. It has a natural tendency to do so. Although the weaving doesn't accurately depict full-scale snowshoe construction, it is close enough, I feel. It was difficult enough to figure out the pattern. | 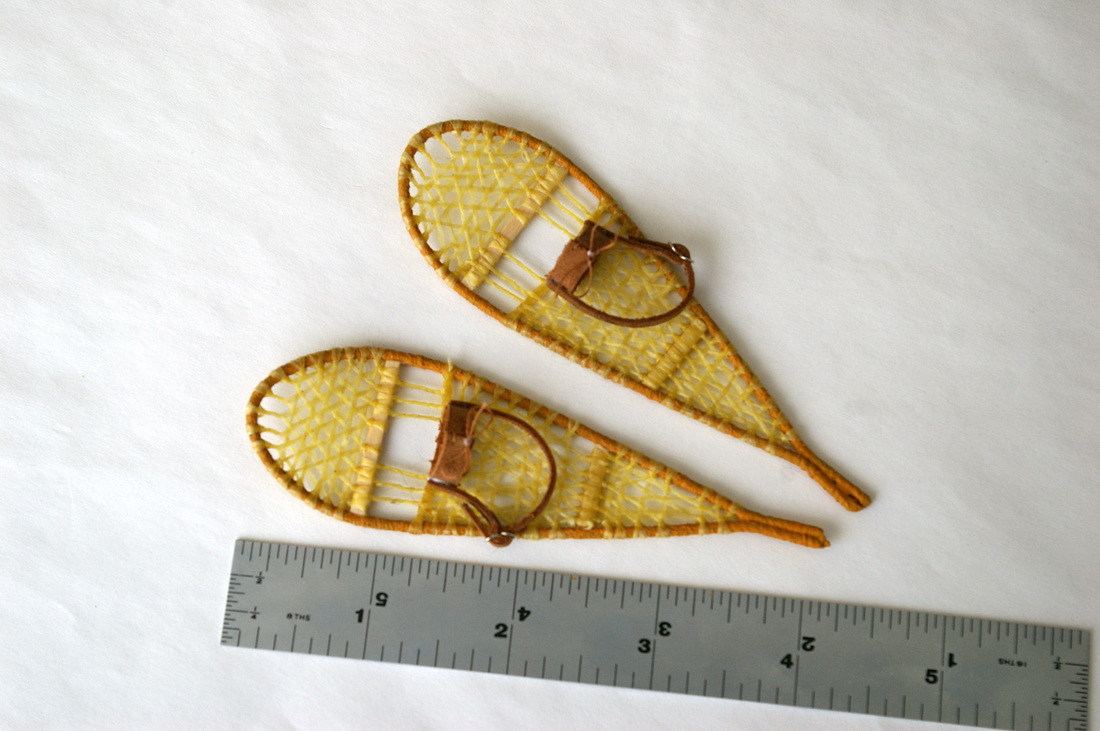 |
I used knots to secure the sinew. I'm not sure of the actual name of the knot, but I was calling them lark's head knots. I'm not sure if it's the right name. Anyway, I started at the toe and after a few prototypes, I documented the pattern and wove and knotted my way until the toe was filled. I then did the heel, which was much easier. The middle section was a little more complicated but it turned out to be not bad, once I fell into my stride. I have to say, I was pleased with the results. The hard part is getting the two snowshoes matching!
For the bindings, I used soft leather from old jacket. I kept that part simple, just two strips of leather, really, for each shoe. One was wider than the other. I made a wire figure 8 buckle for the narrow strap, the part that goes around the mukluk. The bindings get glued onto the snowshoe just behind the toe hole.
Speaking of mukluks, that was a much easier project but as I said, I should have presented that project on a different day. Most club members made the mukluks and never got around to finishing the snowshoes, so I have no idea how difficult it was for them. I feel a little guilty about that. I used the same leather as the bindings as it was easy to stitch and glue. There are really three parts to the mukluk, the sole, the tongue and the leg. Sewing, as opposed to gluing, works the best in the first part. First, the heel gets sewn and then flipped so that the sewing is on the inside. The sole gets sewn onto the toe and tongue section because you have to ease in the toe part. It's too difficult to glue this part, much to the chagrin of my club mates.
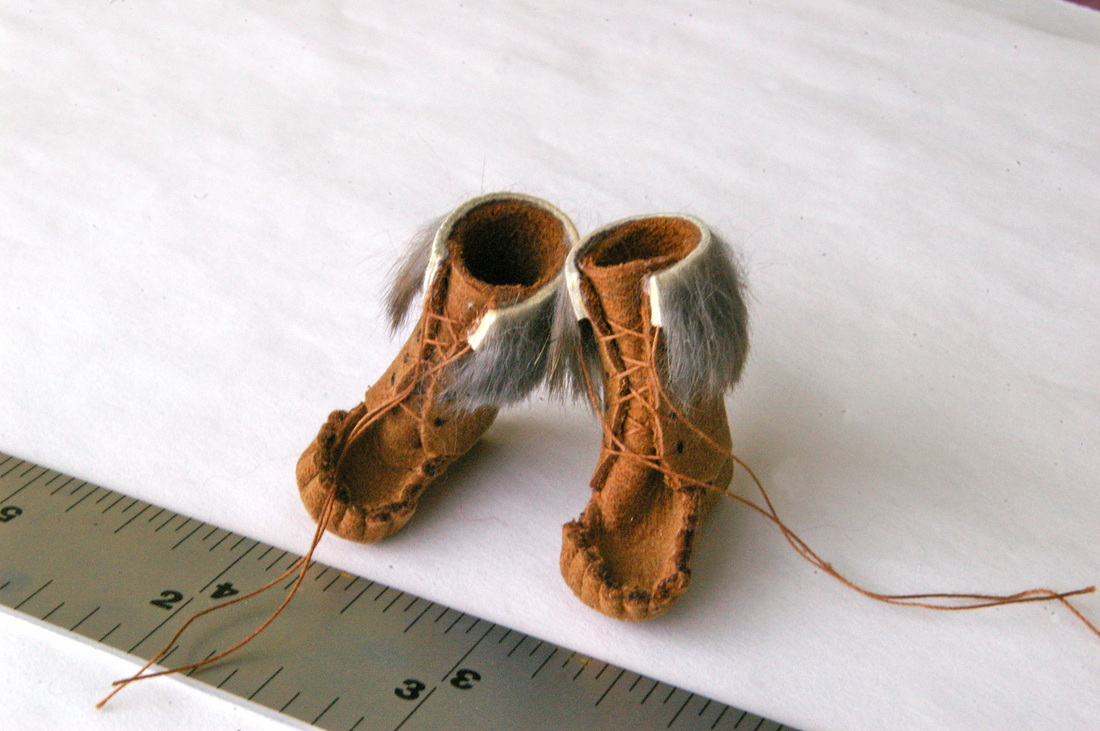 | The top leg section can be glued on and then the laces can be added. The finishing touch is to glue a small strip of fur to the top. Alternatively, I made a leather fringe and glued that onto a second pair. | 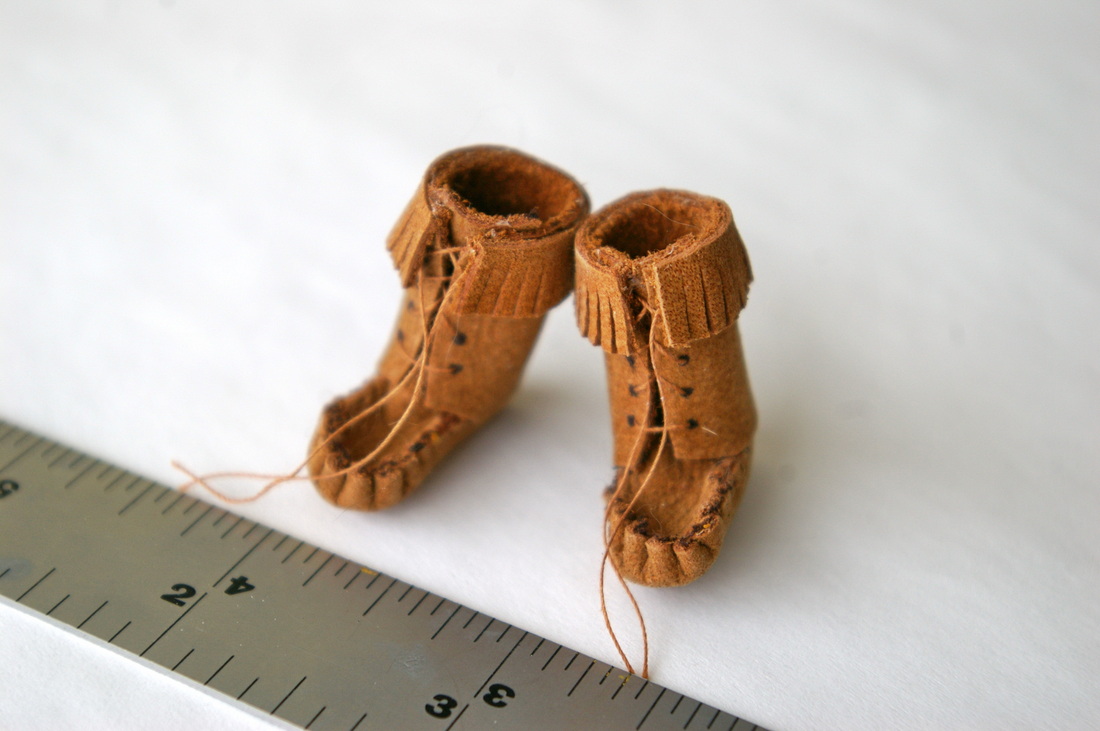 |
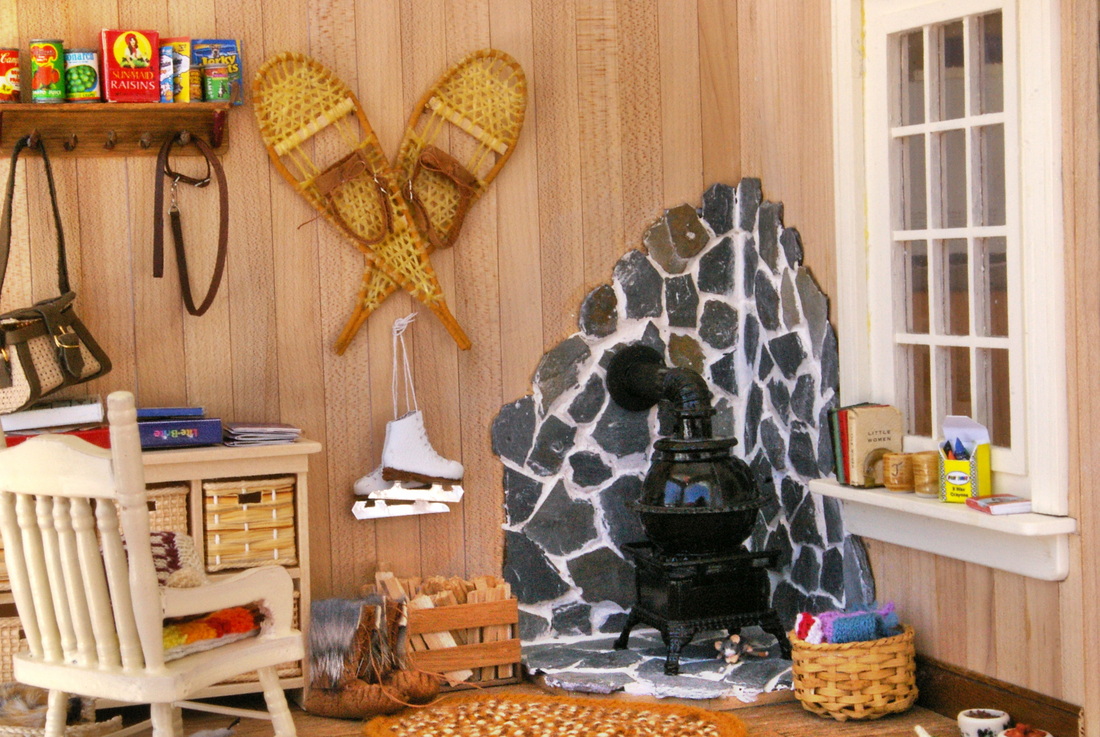
Here is the semi-finished setting for the mukluks and snowshoes. This is the lamp project from Camp Mini Ha Ha 2014. I still have to figure out how to put snow/frost on the windows. By the way, the figure skates is also a project I developed on my own.
 RSS Feed
